Wednesday, 18 March 2015

Recent knits

More sharing! Here are some things I've knit in the past several months...

©Aspiring Threads
I joined over 18,000 other Ravellers in knitting Cookie A's Monkey Socks. I called them my Lemming Socks, because well, 18,000+ other people have knit them, so I must be a lemming.

I made these on our honeymoon. Or rather, I made one of these on our honeymoon. Despite being on an airplane for hours and hours, I didn't actually get a lot of knitting done... the second sock was knit here at home.


©Aspiring Threads
I joined a Ravelry knitalong inspired by the TV adaptation of Diana Gabaldon's Outlander series. The pattern was a challenging knit, and sadly I don't find the finished shawl to be very wearable, but it did turn out beautifully. The shawl is just a little bit too small for me to actually wear, unfortunately. Here's the link to my project page.


©Aspiring Threads
This shawl was a fun, easy, mindless, enjoyable stashbuster. I had a bunch of bulky weight superwash in my stash, but I couldn't remember what I bought it for, so it sat in my bin, neglected.

The yarn was charcoal grey, which is very versatile, but doesn't particularly excite me, so after knitting the shawl, I overdyed it with Jacquard acid dye that I had in my stash. I don't do a lot of dyeing, but it is a nice option to have when you're just not crazy about the colour of your yarn.

I wear this shawl frequently. Sometimes just by itself, but more frequently as an extra layer over a hoodie or a light sweater when I'm not sure what the weather is going to be like. Link here.

©Aspiring Threads
These are my go-to mitts. The pattern is Eunny Jang's Endpaper Mitts, but with charts by a Ravelry member named napkinpoem.

I love these charts, and the colours I picked are so warm and earthy. I don't like gloves, because I can't use my touchscreen and my fingers get cold in spite of being covered, so fingerless mitts are the ideal option for me. My fingers are available for using my phone or picking up after the wooly monster (aka the dog), but my hands are warm. If my fingers get chilly, I can just tuck them inside the palm of the mitt in a loose fist until they're warm again.

I want to make another pair of these, but in different colours. I might make my own chart, but I'm undecided. I like the original charts, and I don't want to make an identical pair to these. Decisions, decisions... I have a while before I need to make a decision though, since mitt weather is coming to a close. Again, link to the project page... here you go!


Tuesday, 17 March 2015

Full bust adjustment on the Granville blouse

I lost a few days last week to some unforseen circumstances, but I'm back to sewing today.

As I mentioned previously, I'm working on my first Sewaholic Granville blouse. Sewaholic patterns are drafted for a pear-shaped figure, which translates into small bust, small waist, and larger hips. I, however, am more hourglass shaped, with a large bust, smallish waist, and hips that match my bust.

For the sake of transparency, here are the measurements I took today...
High bust: 36"
Full bust: 40"
Under bust: 32"
Waist: 34"
Hip: 42"

The measurements for Sewaholic patterns don't match up to my measurements, unfortunately. If I were to sew the size closest to my measurements without any adjustments, I'd end up with a shirt that fit like a tent everywhere but at the full bust. I've talked before about how, when you're bigger than a B cup (not necessarily your bra size - like with ready to wear sizing, sewing pattern cup sizing follows different rules), you can't just go by your full bust measurement and have a garment that fits. You end up with extra width across the upper chest, which makes for weird armhole bagginess, and a big waist and hips.

This is why we do full bust adjustments.

Tasia at Sewaholic has posted several great tutorials on the blog, discussing how to make her patterns work for other types of figures. Just because you're not hourglass shaped, doesn't mean you can't fit Sewaholic patterns to your figure. You just need to know how to adjust them! This post specifically addresses the basics for many of her patterns, telling you just what you need to keep in mind if you're sewing for other figure types.

In my case, with the Granville, I'm sewing it based on my high bust measurement, waist, and hip. This would make it too small at the full bust, but I'll adjust for that with an FBA.

This post by Tasia was very helpful for me to understand the sizing of Sewaholic patterns. The pattern is drafted in such a way that the full bust is 2" larger than the high bust. Therefore, if my high bust measurement is 36", I should sew the size for a 38" bust. Looking at the pattern envelope, that puts me in a size 12/14 as I'm in between. I'll go for the size 12, because I'm only off by 1/2". My waist measurement puts me in a size 14/16, as again, I'm in between sizes. I'm right in the middle, so I could grade between sizes, but if you look at the pattern envelope, the size 14 has a finished measurement of 39" at the waist and the size 16 has a measurement of 41" at the waist. Because I don't want my blouse to be baggy at the waist, I'll sew the size 14 waist. As for my hips, my measurement puts me in a size 10. Why is this size so much smaller when my measurements are reasonably proportionate according to most sewing patterns? Because as I mentioned, these patterns are drafted for a pear shaped figure. I could grade down to a size 10, but to make things easier, I'll use the size 12 for my hips.

To make this more readable and easier to follow, these are the sizes I'm using...
Bust: size 12
Waist: size 14
Hip: size 12

©Aspiring Threads
How do you cut these sizes? Easy. You simply grade between the two sizes to make for the larger waist measurement. A French Curve is very useful for this purpose, as it gives you a nice, smooth curve. Grading can also be done freehand, but I prefer to use the grading ruler.

The next step is the FBA, which many people (including myself) have a love/hate relationship with. In this case, I'm in luck, because the Curvy Sewing Collective has a tutorial on how to do an FBA on this exact pattern! The CSC is geared more toward plus-sized women, but they have a lot of great information on the dreaded FBA, so it's a resource I use often.

©Aspiring Threads
 As I mentioned, I needed to add 2" to my bust. Since a pattern piece is typically 1/2 of the front (except in some circumstances, like my wedding dress, where it is the full front), you divide your increase by half to get the full amount to adjust. I like to use my cutting mat for this purpose, as it has a 1" grid, so it makes these adjustments quite easy.
©Aspiring Threads
 It is easiest to use pattern weights, which I need. Instead, as you can see above, I used various small, heavy objects to keep my pattern in place while I slipped bits of paper into the spaces. In this picture, you can see my completed FBA. I've trued my dart, and added the necessary length to the centre front section, so that it matches up with the side, where it got longer thanks to the adjustment.
©Aspiring Threads

Here's my bodice front, complete with FBA, with the dart graded into the original bottom front that I cut off in the beginning of the FBA, per the CSC tutorial. This eliminates the need for waist darts, which are not a design element of this shirt. I've never used this method before, which makes me a little nervous, but I really didn't want to add darts to the waist. This shirt is fitted, but not body-hugging, so I think it will work just fine. Because of this grading, I didn't need to grade separately for my waist measurement, though I did grade the back pieces.

The other thing to keep in mind is that if you have a pattern with a separate button band (like this one), you'll have to add to the band as well, if you do an FBA. Remember in the second to last photograph, there was a section of the front that needed to be moved down? That space needs to be added to the button band as well! It will also change your button placement, so you need to keep that in mind when transferring markings to your fabric.

Next step... cutting my fabric!

Monday, 16 March 2015

Wibbly Wobbly Timey Wimey mitts

Daughter is a Doctor Who fan. Her favourite doctor is the 12th doctor, and I can't blame her. He's a pretty awesome chap. Funny and good looking to boot. For Christmas/Yule, she asked for mitts, so I decided to surprise her. She didn't know what I was making, but she did say she wanted mitts without fingers.

©Aspiring Threads
Excellent. That makes it easy! I knew exactly what pattern I'd use... but there were no Doctor Who Endpaper mitt charts available. What's a knitter to do?

Obviously, the first step is to get appropriate yarn... in this case, Knit Picks Palette in White and Celestial were perfect colours, since she's obsessed with the Tardis and loves the colour blue.

I tried my hand at designing my own charts, but thought I'd see if there were any charts available that I could modify to fit the bill, and came across a couple of different ones thanks to Ravelry.


©Aspiring Threads
The charts were free, which is a big bonus. Thank you to Amy Schilling for your awesome free charts!

I picked a few motifs from the charts. One mitt has a Tardis, a weeping angel, and bowties on it (because bowties are awesome). The other mitt has a Dalek, a sonic screwdriver, and a gas mask (the lost child creeps me out, but daughter thinks they're awesome).

The pattern, as I mentioned previously, is the Endpaper mitts pattern, which I've now knit three times, and will likely make again.

I did have to modify the charts somewhat, to get everything to fit. Mostly on the Dalek mitt, because the Dalek was too tall and too wide to fit otherwise. So was the sonic screwdriver. The end result was a very happy girl with very cool mitts that are warm, reversible, and the envy of her friends. I'd say that they were a big success!

Here's my Ravelry project page, if you want to see more pictures.

Friday, 6 March 2015

Sewing with PDF patterns

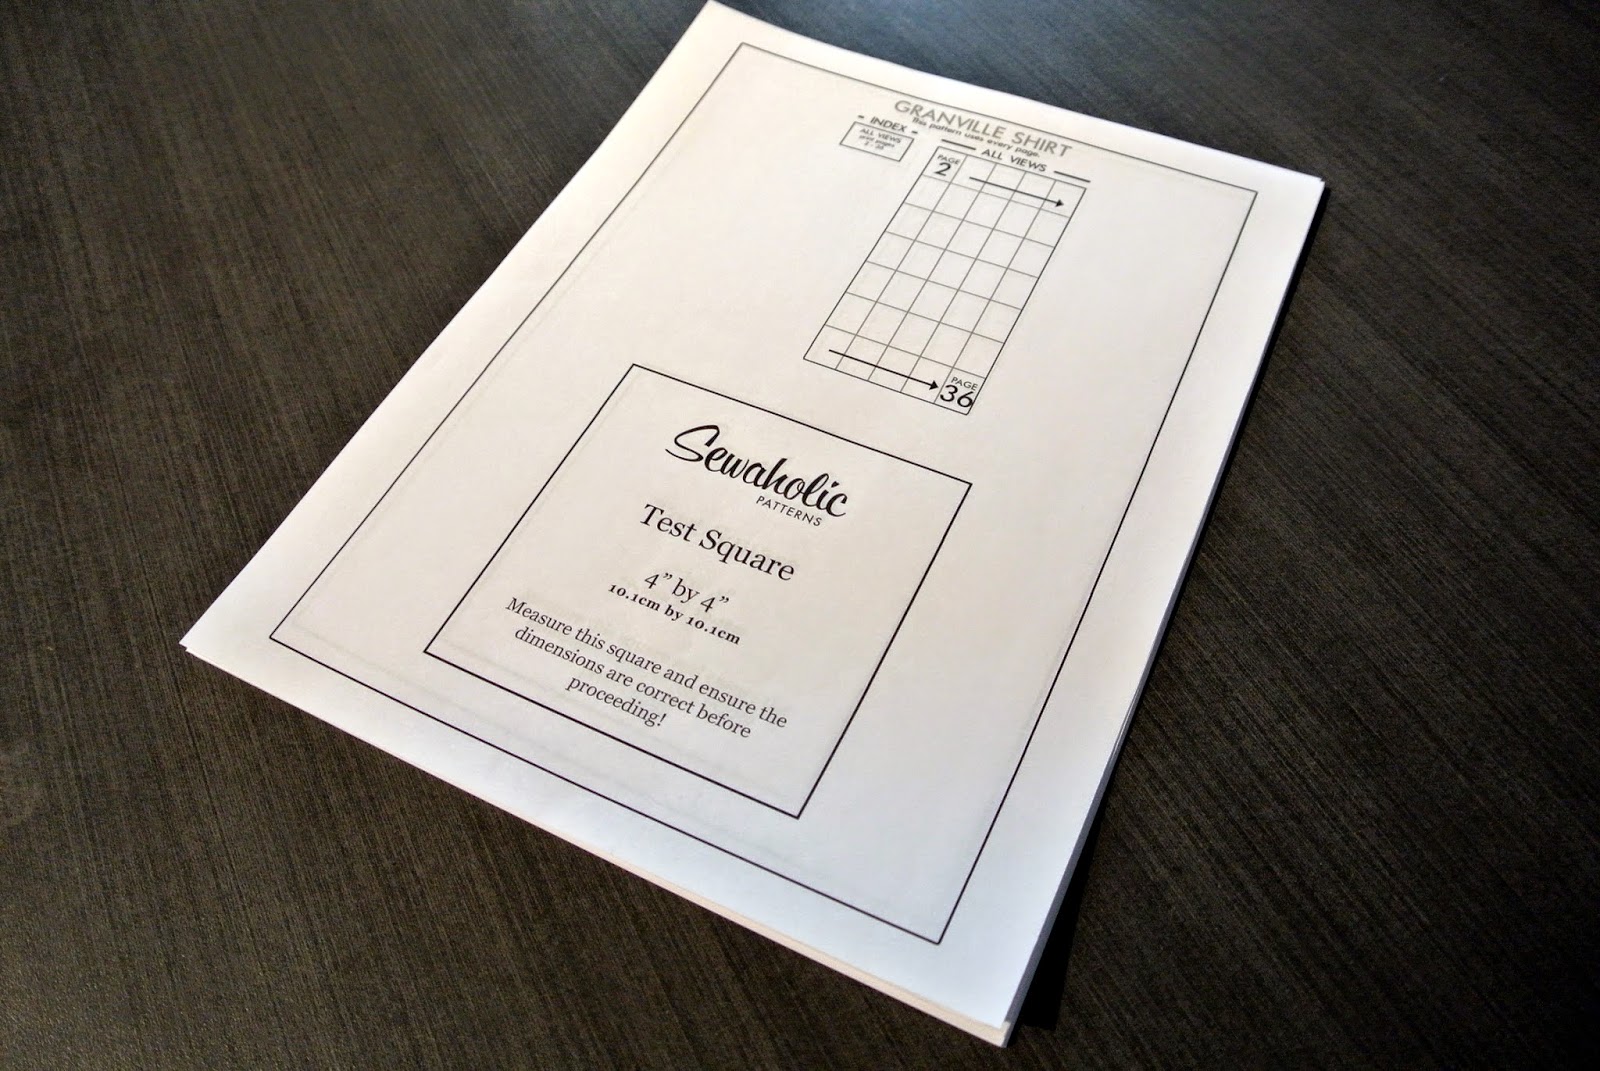
It's been a busy few days, but I printed the pattern for my Granville shirt yesterday. I wasn't expecting to be able to do so until today, but I had an unexpected change of plans, so I managed it a day early.

I thought I'd do a quick overview on how to sew from PDF patterns. Usually when you buy a pattern at the fabric store, you come home with an envelope full of enormous sheets of tissue. This tissue is great for test fitting, because it's soft and drapes reasonably well, but it's also horrible, because it tears easily. Additionally, tissue patterns can only be cut out once, so if you think you might want to sew another size someday, you'll need to think ahead and trace the pattern onto another sheet of tissue, or buy the pattern again.

In the case of Sewaholic patterns, they also give you a PDF file scaled to larger paper so that you can have it printed at a print shop. This means far less matching and taping, but you have to pay to have it done. I like the convenience and cost savings of doing it at home, but you do spend more time assembling the pattern.

When sewing from a PDF pattern, it will usually be scaled to fit on 8.5x11" sheets of paper. You'll need the following: paper, a printer, scissors, tape, and a large flat surface.

When you print any PDF pattern, make sure to take page scaling off. What your printer's default will probably be set at "fit to page" which is great, except when printing PDF patterns. The Granville shirt has 36 pages, plus this layout page showing how the pages need to be taped together. It also has a square at the bottom that must measure 4" high by 4" wide. Knitters will recognize this, because we (usually begrudgingly) knit gauge swatches to make sure that our knits will fit. Make sure this square matches the dimensions stated, or you'll have a garment that does not fit.

One of the downsides of PDF patterns is that every once in a while, something doesn't quite match up. Do you see those circles? You're supposed to match them. In this pattern, they're conveniently labelled... so the E3 half circle on the first page should line up with the matching E3 half circle on the following page...

In this case, if I'd matched the circles, my sleeve cap would have been fine, but everything on the page beside it would have been a hot mess. All is not lost however. I just trimmed around the sleeve cap on the affected page, and matched up the cutting lines (and in this case the layout circles on the sleeve) and carried on. I've had this happen with several different PDF patterns, from several different sources. I believe it is simply a fact of life, that sometimes the PDF won't match up. It's very easy to fix though, so it really doesn't bother me.

One thing that I find helpful is to trim the borders of the pages before trying to tape them. It helps in lining everything up, because there's always a border, usually about 1/2" or so, around the pattern piece. You'll need those borders gone in order to line things up and cut out your pattern pieces. To save time, I only cut the edges I'm matching (I work from the top left, across, then down). This means I cut only the top and left edges. The bottom and right edges lay underneath the following pages.

You're going to need a lot of tape. Your pattern will be much easier to manage if all of the seams are completely taped. In order to save on tape, I only tape the actual pattern pieces, instead of spaces on the paper that are between pieces. Waste not, want not, right?

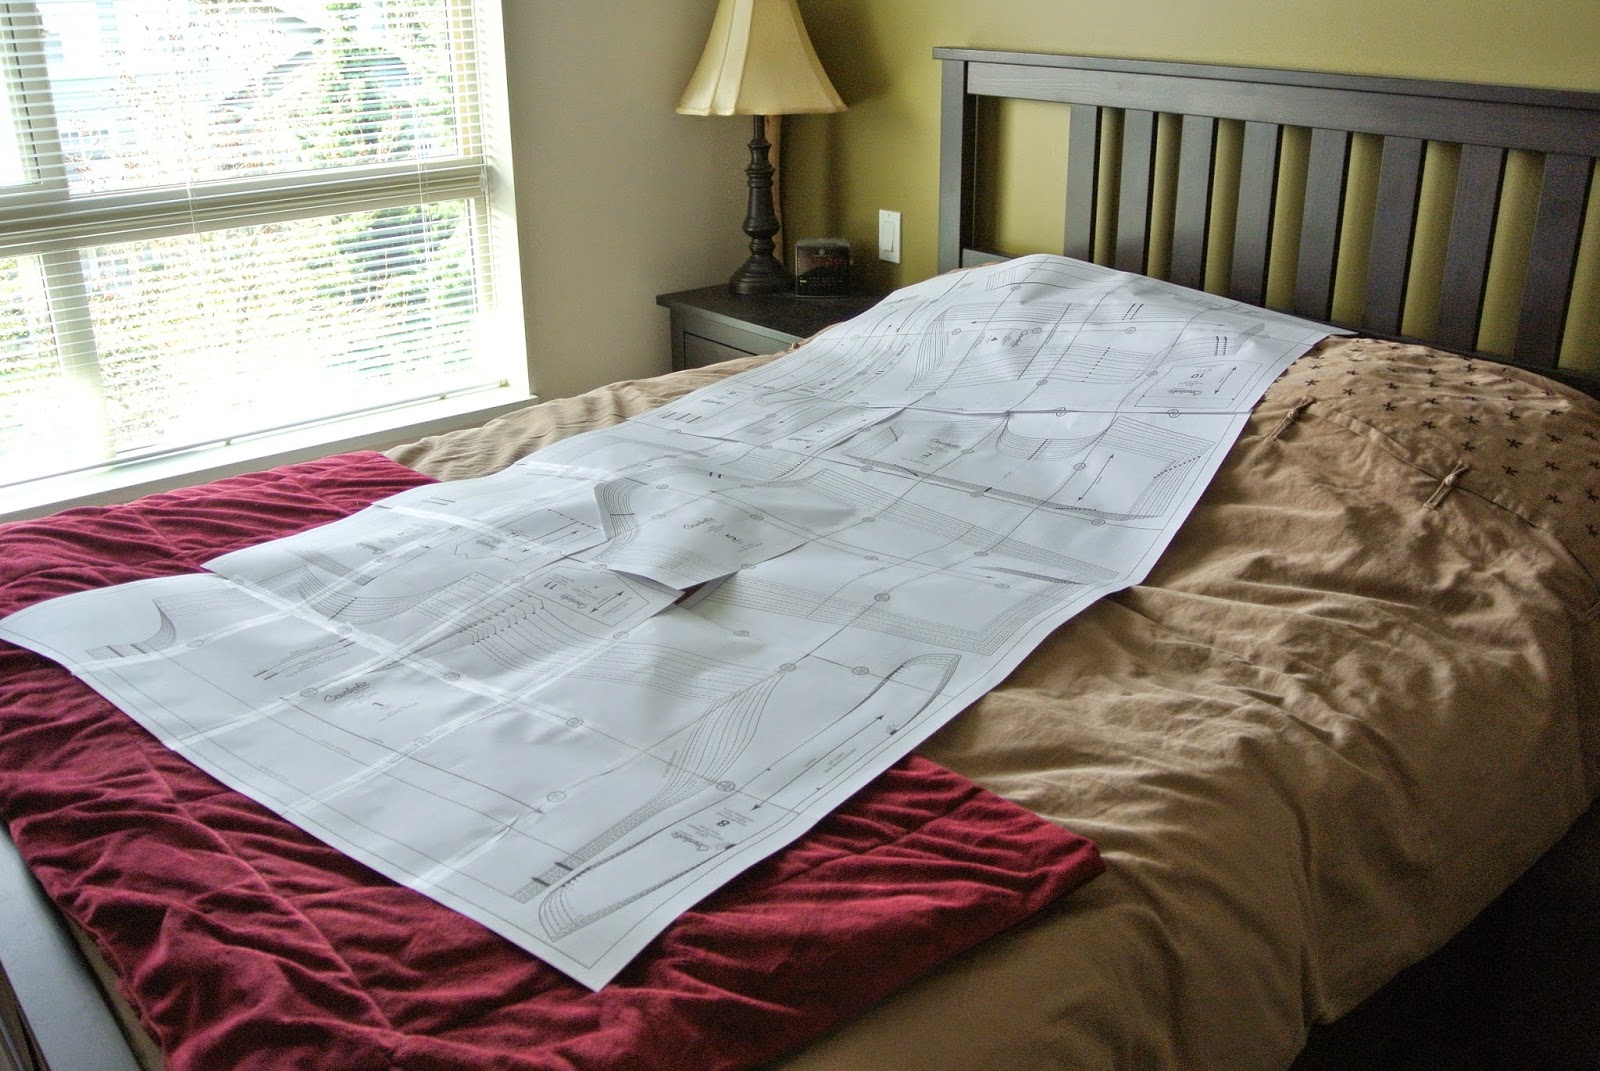
When you're finished, you should have something that looks like this. Your pattern is all laid out in one gigantic sheet of paper. 36 pages, all lined up and taped together, in this case, takes up most of a queen sized bed.

Sometimes the pattern pieces are laid out on the paper in such a way that you can break it up into sections, but they're usually done so that you don't waste too much paper. This means you're probably going to end up with an enormous sheet of paper when you're done. You can certainly cut the pattern pieces out as you go, but I decided to tape everything together so I could show you the process in its entirety.

The next step is to cut out all of those pattern pieces, do any adjustments, and lay it out to cut your fabric. I'll address this step next week, as I don't have any time for sewing this weekend.

Have a great weekend!

Wednesday, 4 March 2015

The wedding dress, continued

I've had a few people ask me for more information about my wedding dress, so I'm putting it here.

Image courtesy of www.butterick.mccall.com
Butterick 6582 is a pattern I've had in my collection for a very long time. It's a vintage reprint, and I love vintage fashion, especially from the 1950's, when women wore glamourous dresses with full skirts and brooches, and house dresses were the norm, instead of jeans and t-shirts.

I probably purchased this pattern around 2007 or 2008, but didn't think I'd ever have a reason to sew it, so it sat in my pattern box until last year, when I finally had a good reason to make myself an awesome dress.

Because it was my second marriage, and I hate how I look in traditional wedding dresses, I decided that I wanted to go with a vintage look, and that it would most definitely NOT be white, or any of white's close relatives.

©Aspiring Threads
No, my dress had to be green. I have two favourite colours, and I didn't want to wear purple for the wedding, because it just didn't seem to suit the occasion. That left green. I found this beautiful fabric that was nubby like raw silk, but was a stiffer fabric. I can't remember the name of the fabric now... Anyway, it was really affordable. I think I only spent about $150 on the fabric for three dresses, which is a steal!

As I said in a previous post, my figure requires a full bust adjustment, otherwise known as a FBA. I'd never done one before, but thought it couldn't possibly be THAT hard. Well. I was wrong. Apparently, it is more complicated than the tutorials make it look.

©Aspiring Threads
Because of the shape of the bodice on this dress, I thought it would be too difficult, so I chose a different pattern... After several muslins (using leftover quilting cottons that were in my stash), I finally had a dress I could wear.

You don't want to know how many muslins I went through. I think it was around eight, possibly more. I stopped counting, because I was too frustrated to keep track.

I have to admit, I don't remember what the pattern was. I was happy with the fit, but should have extended the bodice more, because the waist was a bit too high... but the bodice fit my bust, and that was all that I really cared about at that point, because I honestly thought I was going to be arriving at the wedding in my underwear.

Once I got this dress to work, I decided to try transferring my modifications to the original pattern I wanted to sew, and wouldn't you know, it actually worked. I had to do a bit of tweaking, because the pattern had different darts, but it worked.
©Aspiring Threads

Here it is on my (way too small for me) dress form. One of these days, I'm going to pad this thing out to my measurements. I got it in order to use it for sewing for myself, and at this size, it's completely useless for this purpose.

Anyway. The dress is finished at this stage, except for making the belt. I sewed decorative bead slides onto the shoulders, as they were a perfect complement to the colours in the dresses (gold, burgundy and green). I used another in my fascinator, in fact.

I can't recall if I put the petticoat under the dress for this photograph. I think that I did, but don't quote me on that. The dress also needed ironing, so please ignore the creases.

©Wanderlust Photography
As I mentioned previously, I could have tweaked the bodice a bit more than I did to get a perfect fit, but I came close enough to a perfect fit and I was happy with my dress. Would I make this dress again? Certainly I would. It was not a very challenging pattern, once the FBA was done. I did omit the facings and line the bodice instead, because it was my wedding dress and I've never been a fan of facings, especially in dresses.

In the end, I'd say this pattern is best suited to someone who has more standard measurements than I do, but if you're willing to do the work and have the patience to do FBAs, it's well worth your time. It really does make a nice dress. Maybe my next one will be the wiggle dress... a gal can't have too many dresses, can she?

My Cambie

My introduction to Sewaholic patterns actually came from Gertie's Blog For Better Sewing quite some time ago. The Cambie dress was released in 2012, and caused quite a stir.

Gertie's version was amazing, and I thought "oh, I need that pattern! That dress would be so perfect as an every day dress... or even a special occasion dress!"

Then she sewed it a second time. I was sold! However, I didn't pick up the pattern right away. In fact, I waited for over a year to buy it.

If you Google "cambie dress" a ton of images come up... I think my favourite is this one. It even works as a wedding dress! This, dear readers, is why I finally bought the pattern... Remember my post about sewing for our wedding? I said I was having trouble with the FBA on my dress, and tried other patterns. The Cambie was my safety net. I could find lots of tutorials for doing a FBA on this dress, so if worst came to worst, I could make this dress work for my needs.

©Aspiring Threads
Obviously, I managed to make my 1950's reproduction work for the wedding dress, so the Cambie pattern didn't get sewn... until November, when I decided that I needed to make the dress, immediately if not sooner. I had this fantastic quilting cotton that I bought at Fabricana for way too much money on a trip there with my friend Andrea before she moved away... the fabric was earmarked for a dress, but I didn't know what dress I'd make with it.

Well, Cambie was a perfect match for the fabric. I decided against the sweetheart neckline, because I am not a fan of that neckline for myself, so I followed Tasia's super simple tutorial for the "slightly less sweet" Cambie dress.

I must have learned a thing or two about doing a FBA while making my wedding dress, because aside from a tiny bit of tweaking with the dart points, my FBA was perfect on the first try with this dress. The only challenge I did have with it was with the shoulders, which were several inches too long.

©Aspiring Threads
My dress made its first appearance at a brunch that my husband and I went to before Christmas, and I got several compliments on it. Cambie is fully lined too, so even in quilting cotton, it feels luxurious and expensive.  I haven't made another yet, but I'm definitely going to. I love the A-line skirt on this dress, because it has pockets, and it's very grown up. I'm not usually a big fan of gathered skirts, because they can come off looking a bit childish, and I'm now past 40, so as far as my wardrobe is concerned, gathers have a time and place... like in a wedding dress. For every day wear, I feel a bit out of place in a gathered skirt.

Another great thing about this dress is that it looks fantastic with fitted sweaters. It's really an all-season dress, in spite of it being sleeveless. It also shows off my owl tattoo, which I always feel is a shame to cover up, because looking at it makes me feel so fantastic.

The only thing I'm not 100% happy about is that I should have made one size smaller, as there's a bit of extra width on the bodice. I bought the paper pattern of this dress, and in the future, I'll buy the PDF so that I can cut different sizes without having to either trace the pattern or buy a new one, because that's just wasteful.

In fact, right now I'm working on a rusty orange sweater that will be a perfect complement to this dress... but that's another post for another day.

Tuesday, 3 March 2015

Oakridge & Granville

As I mentioned earlier today, I went to the fabric store to find fabric to make myself an Oakridge blouse. I love the simplicity of this pattern, and think it is great for dressing up with a pencil skirt or nice pants. It would be great under a blazer too.

At the same time, it will be fantastic with jeans too, which is pretty much what I live in about nine months of the year. I would wear skirts and dresses more often, but they're not very practical when you're out and about with the dog, or when it is raining.

This is one of the problems I have with my so-called wardrobe... it's all based on comfort and practicality, which is fine, however it is rather unexciting and dull. I can't tell you how many t-shirts I own, because the number would probably be embarrassing. They're not even interesting t-shirts.

Obviously I need something better than boring t-shirts to wear with my jeans, right?

The fabric store can be a scary place at this time of year. You still find a lot of winter fabrics, because let's face it, spring isn't here quite yet. Unfortunately, all of the autumn fabrics are either gone, or buried somewhere that I can't find them, because the warm earthy fall colours are usually what I'm after.

Upon entering the store, I was assaulted by bright greens, pinks and yellows. It was like I had stepped into the 1960's, and not in a good way. Big flowers. Bold prints. Everything I saw made me wish I could put my sunglasses on and still see well enough to find fabric that I liked. Every spring I have this kind of experience when I go fabric shopping. Lots of incredibly bright prints, and nothing that I could actually wear. I always think "ok Hazel, this is a good opportunity for you to step outside of your comfort zone and try new colours!"

Um, no. Just no. I tried to like them. There were no mirrors, so I ended up holding up fabrics by my face and using the forward-facing camera on my phone. Almost everything was terrible for me.

I had wanted a nice soft cotton for my Oakridge blouse, and I wasn't finding any that suited me. I didn't really want a plain colour, and even if I had been willing to settle for one, they were all pastels, which I don't like on myself. The prints were, in a word, loud. Buying fabric online is a crapshoot, because you don't know how the fabric is going to feel, or what the drape will be like.

After what felt like an hour (and probably was at least an hour) I finally chose two fabrics that I could live with. As I said, I'd wanted cottons, but couldn't find any that I liked, so I ended up with polyester. This one is a pretty blue, with a bit of a teal tint to it. It isn't too clingy, so it should be fine to wear while the weather is still cold. We're still dealing with a lot of static cling here! Unfortunately, I couldn't get a really good photograph of the colour, as the sunlight tends to make it look lighter than it actually is.

This second fabric is WAY outside of my comfort zone, but without being loud or obnoxious. It's a nice soft green that's a bit on the cool side for me, but it's warm enough that I can get away with it. If I hadn't had the opportunity to see it up against my face, I would not have purchased it though. This fabric was also available with a yellow background, which I would never wear. I can wear certain shades of orange, but I don't even try to wear yellow.


Now, I know I said I was only going to buy fabric for the Oakridge blouse, since I have lots of quilting cottons that I can use for the Granville blouse, but while looking for suitable fabric for Oakridge, I wandered into the clearance racks hoping to find something left over from autumn. A nice green paisley would have been right up my alley! Or a rusty orange floral! How about something, anything in eggplant or wine?

Needless to say, I didn't have any luck in the clearance section. Either they put all of those perfect autumn fabrics away for next year, someone bought them all up, or they didn't exist in the first place. I suspect that I will never know...

Fortunately, I brought the fabric requirements for the Granville blouse with me, just in case... because I'm a sucker for pretty fabric... and I found some.


It's a cotton, and it was 70% off. How could I say no? The background is black, and anyone who knows me knows how much I love to wear black... the floral pattern is bright, without being loud, and looks like a painting. I could picture this fabric as a Granville blouse, and absolutely had to have it.

In fact, I might make the Granville first, because I love this fabric so much!

Unfortunately, tomorrow I will not have any time to sew, but I will have time to print out my PDF patterns and hopefully do my FBA on at least one of them. Thursday I have a full day, so hopefully on Friday I will actually have an opportunity to do a muslin of one of these blouses, so that I can work out any bugs in the fit. I am hoping to get three blouses sewn in the next two weeks, because I need new stuff to wear!