
I thought I'd do a quick overview on how to sew from PDF patterns. Usually when you buy a pattern at the fabric store, you come home with an envelope full of enormous sheets of tissue. This tissue is great for test fitting, because it's soft and drapes reasonably well, but it's also horrible, because it tears easily. Additionally, tissue patterns can only be cut out once, so if you think you might want to sew another size someday, you'll need to think ahead and trace the pattern onto another sheet of tissue, or buy the pattern again.
In the case of Sewaholic patterns, they also give you a PDF file scaled to larger paper so that you can have it printed at a print shop. This means far less matching and taping, but you have to pay to have it done. I like the convenience and cost savings of doing it at home, but you do spend more time assembling the pattern.
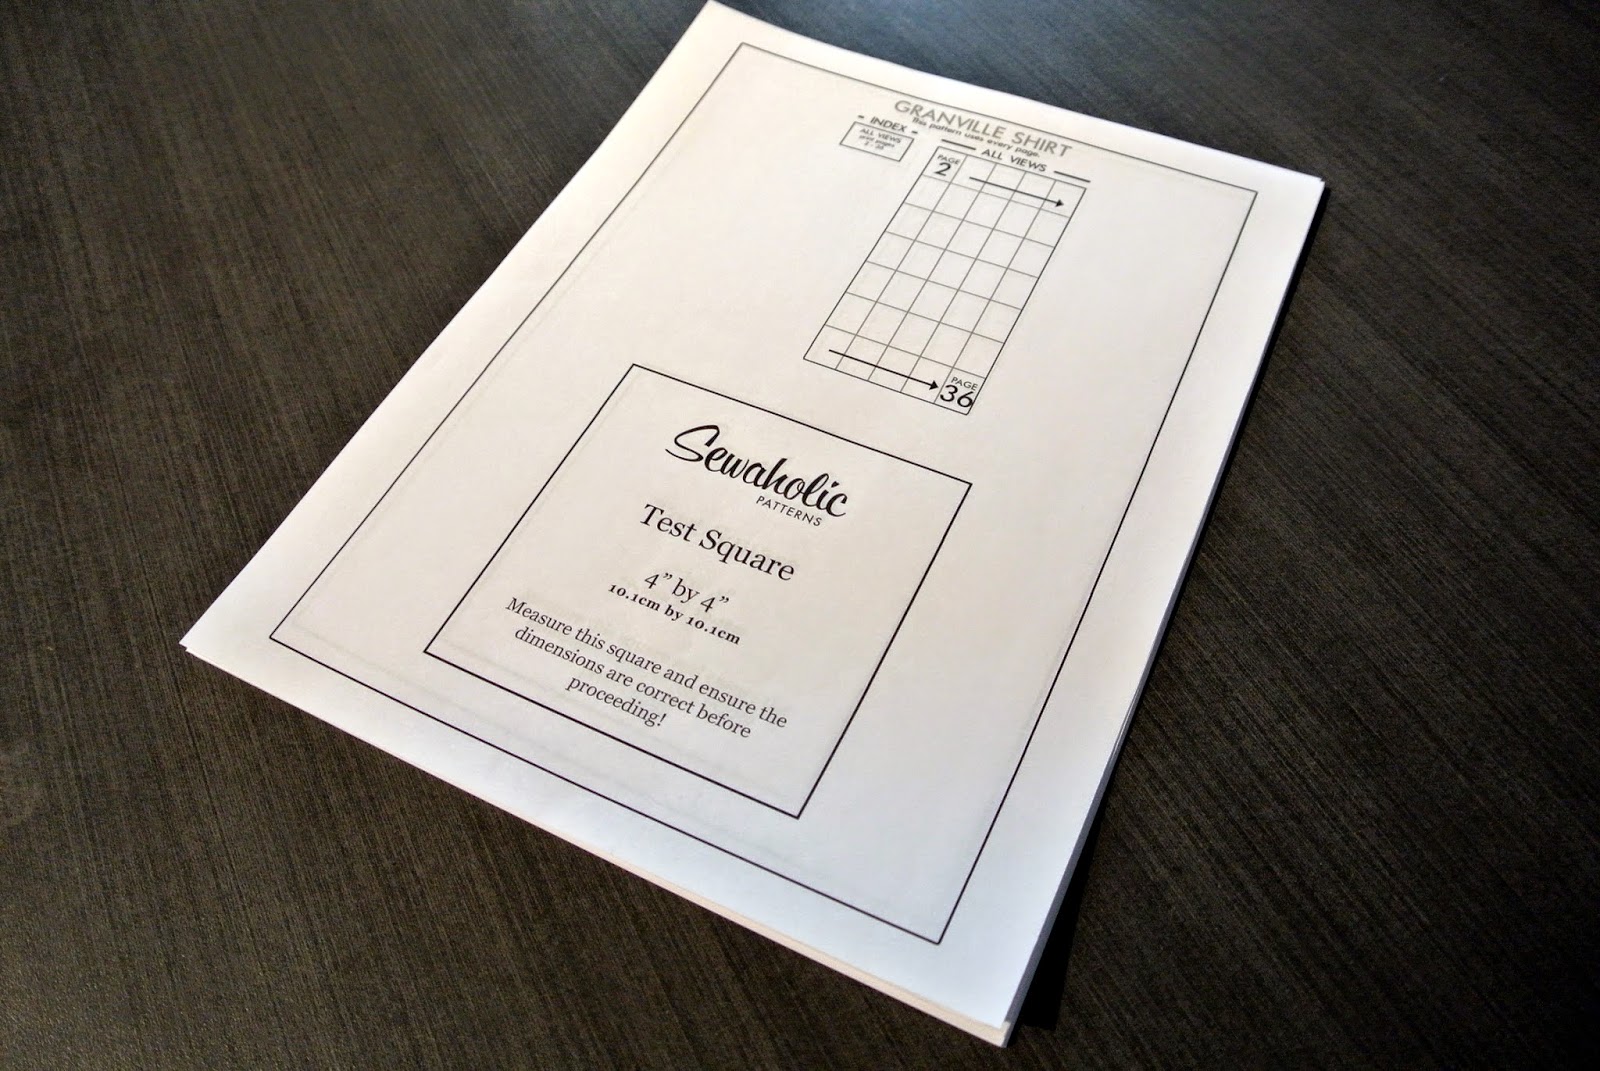
When sewing from a PDF pattern, it will usually be scaled to fit on 8.5x11" sheets of paper. You'll need the following: paper, a printer, scissors, tape, and a large flat surface.

In this case, if I'd matched the circles, my sleeve cap would have been fine, but everything on the page beside it would have been a hot mess. All is not lost however. I just trimmed around the sleeve cap on the affected page, and matched up the cutting lines (and in this case the layout circles on the sleeve) and carried on. I've had this happen with several different PDF patterns, from several different sources. I believe it is simply a fact of life, that sometimes the PDF won't match up. It's very easy to fix though, so it really doesn't bother me.
One thing that I find helpful is to trim the borders of the pages before trying to tape them. It helps in lining everything up, because there's always a border, usually about 1/2" or so, around the pattern piece. You'll need those borders gone in order to line things up and cut out your pattern pieces. To save time, I only cut the edges I'm matching (I work from the top left, across, then down). This means I cut only the top and left edges. The bottom and right edges lay underneath the following pages.
You're going to need a lot of tape. Your pattern will be much easier to manage if all of the seams are completely taped. In order to save on tape, I only tape the actual pattern pieces, instead of spaces on the paper that are between pieces. Waste not, want not, right?
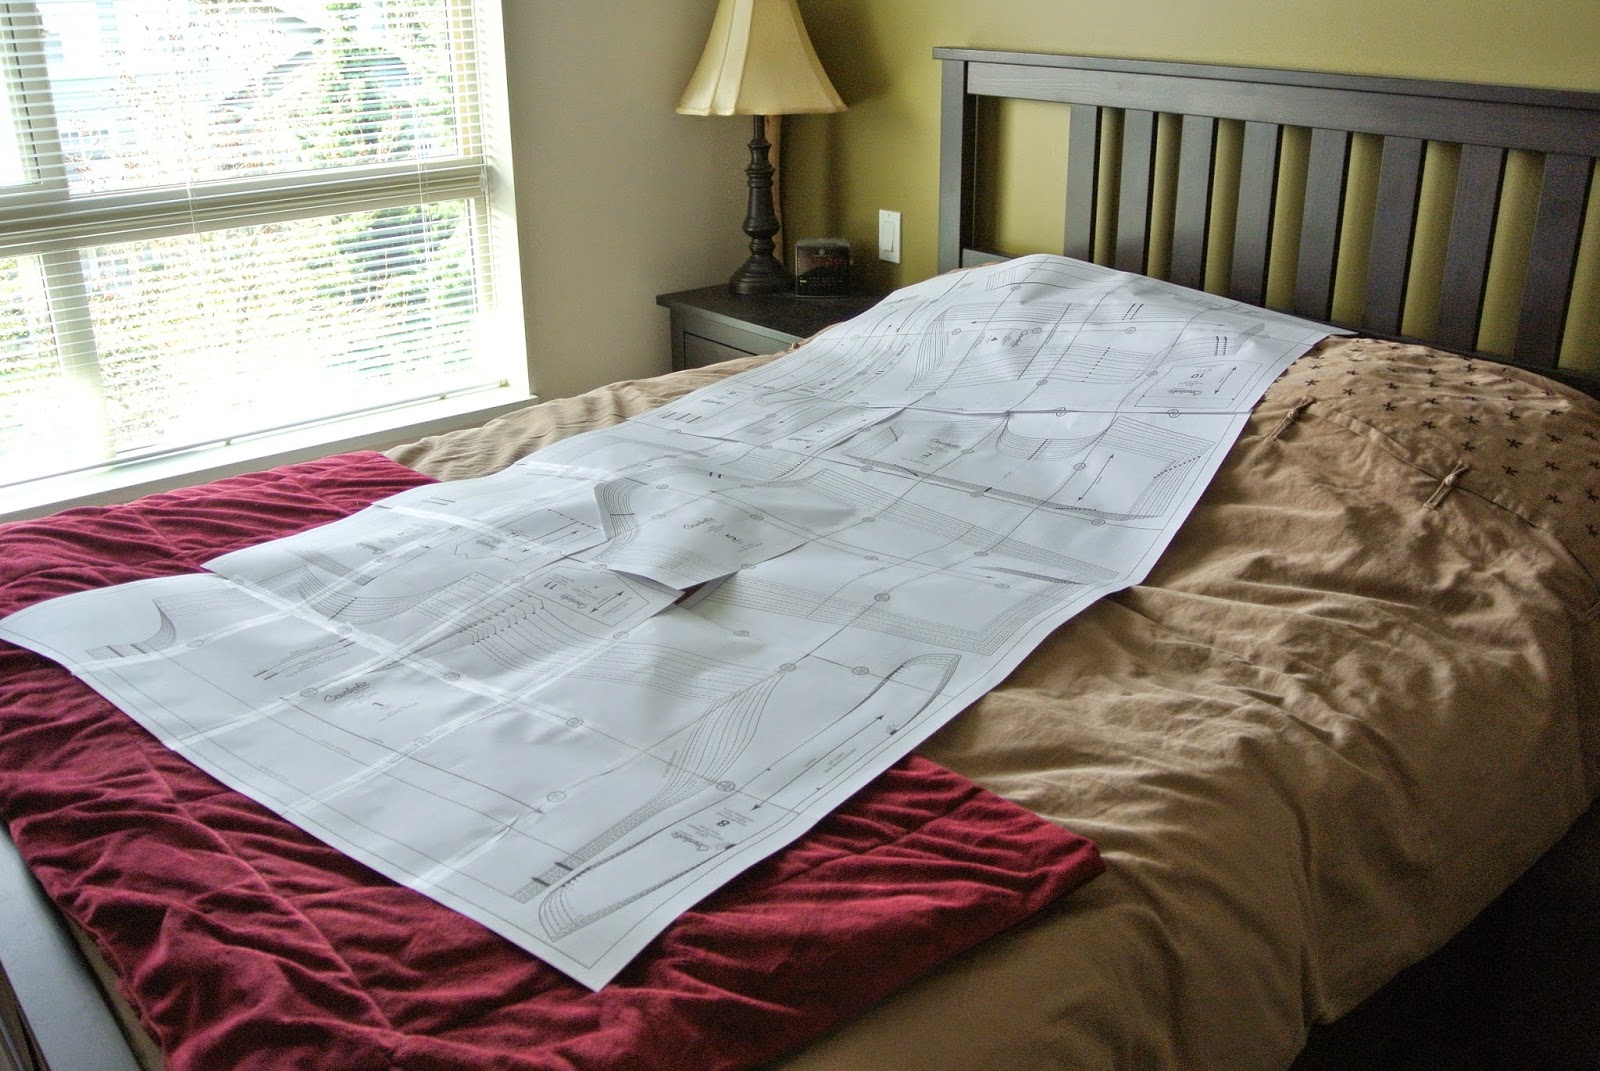
Sometimes the pattern pieces are laid out on the paper in such a way that you can break it up into sections, but they're usually done so that you don't waste too much paper. This means you're probably going to end up with an enormous sheet of paper when you're done. You can certainly cut the pattern pieces out as you go, but I decided to tape everything together so I could show you the process in its entirety.
The next step is to cut out all of those pattern pieces, do any adjustments, and lay it out to cut your fabric. I'll address this step next week, as I don't have any time for sewing this weekend.
Have a great weekend!
No comments:
Post a Comment